 Save
Save I still remember the afternoon my niece came home with her graduation cap, and I wanted to create something that celebrated her achievement in the most playful way possible. While she was upstairs changing, I raided the pantry and realized I could build tiny edible caps right on the kitchen counter. The first one made her laugh so hard when she came down—it was love at first bite. Now, every graduation party in our family starts with these whimsical little creations, and honestly, they've become more memorable than the actual cake.
What really sealed the deal for me was watching my best friend's daughter pick up one of these at her own graduation open house and say, 'This is the coolest thing I've ever eaten.' She kept coming back for more, and her friends were taking pictures for Instagram. That's when I knew these weren't just snacks—they were little edible moments of joy.
Ingredients
- Square crackers (12 pieces): Wheat Thins, water crackers, or even those sturdy cheese crackers work beautifully. The key is choosing something firm enough that it won't crumble under the weight of the cheese—I learned that lesson the hard way with some delicate rice crackers
- Square cheese slices (12 pieces): Cheddar, Swiss, or American cheese all work wonderfully. I prefer sharp cheddar because it has enough personality to stand up to the sweetness of the tassel, but honestly, any cheese you love will work. Cut them into roughly 1.5-inch squares so they align perfectly with your crackers
- Licorice strings or dried fruit strips (12 pieces): Black licorice is traditional and creates that perfect tassel effect, but dried mango, apricot, or even fruit leather strips add a beautiful splash of color. Cut them about 3 inches long—long enough to drape gracefully but not so long they look awkward
- Cream cheese or hummus (small dots): This is your edible glue, and it matters more than you'd think. A tiny dab is all you need to secure everything, and it adds an extra layer of flavor and creaminess that ties everything together
- Candy pearls or raisins (12 pieces, optional): These tiny touches represent the buttons on real graduation caps. I love using pearl candies for a bit of sparkle, but raisins work just fine and feel more homemade
Tired of Takeout? 🥡
Get 10 meals you can make faster than delivery arrives. Seriously.
One email. No spam. Unsubscribe anytime.
Instructions
- Start with your foundation:
- Lay out all 12 square crackers on a serving platter or large cutting board. Think of this as setting up your workspace before you begin. It helps you see what you're working with and makes assembly feel less chaotic.
- Crown each cracker:
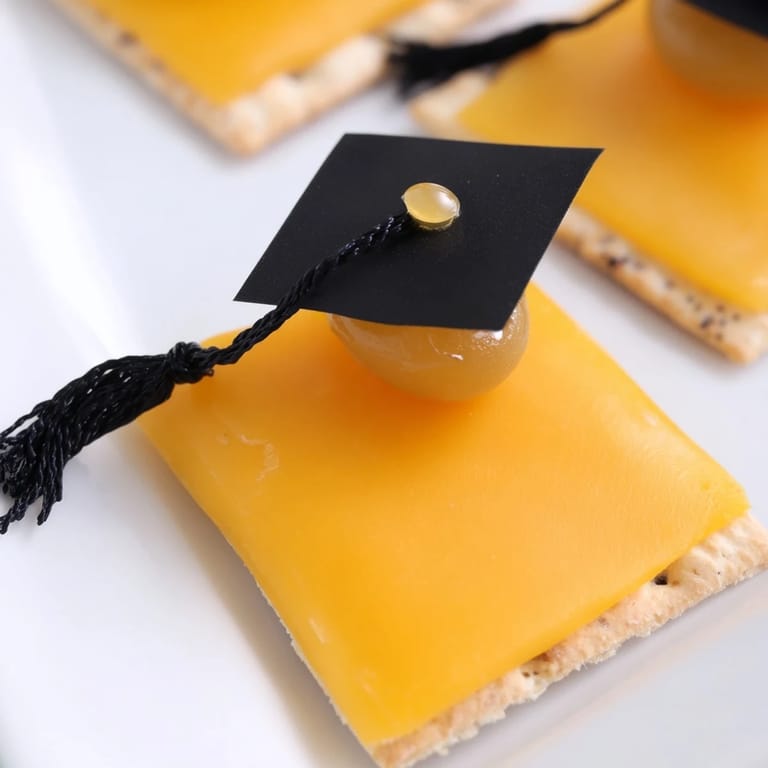
- Place one slice of cheese on top of each cracker, aligning the corners so the edges match perfectly. This is where the magic happens—that neat, square-on-square alignment is what makes them actually look like tiny graduation caps. If the edges are uneven, don't stress, just smooth them out gently.
- Attach your tassel:
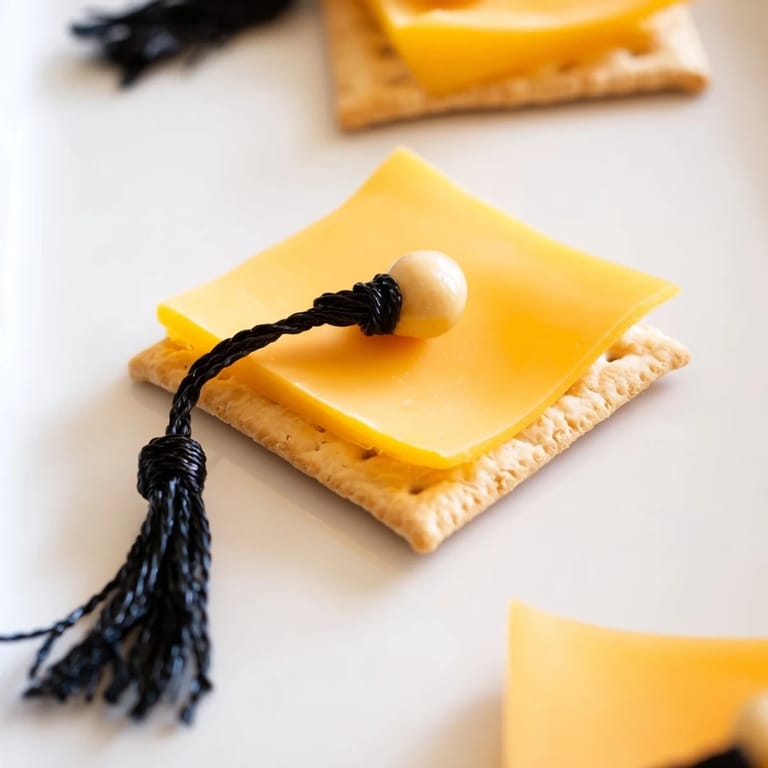
- Here's where finesse matters just a little bit. Take one corner of your licorice string or dried fruit strip and secure it to one corner of the cheese square with a small dab of cream cheese or hummus. Use your spreading knife or the back of a spoon to press it gently but firmly. Let the rest of the tassel drape naturally over the edge of the platter—this creates that beautiful cascading effect that makes people smile when they see it.
- Add the button (if using):
- If you're using candy pearls or raisins, place one gently over the end of the tassel where it attaches, securing it with just a tiny touch more cream cheese. This small detail actually changes the whole appearance—suddenly it looks intentional and polished, like real graduation caps.
- Complete the assembly:
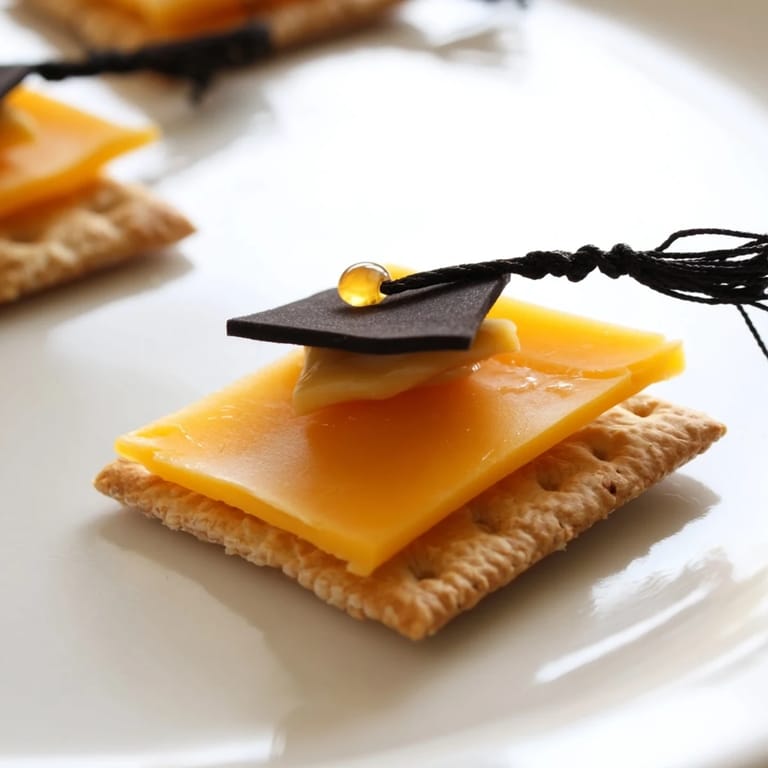
- Repeat this process with your remaining ingredients, working methodically so each cap gets the same care and attention. You're not just assembling snacks; you're creating little edible works of art.
- Serve immediately:
- These are best enjoyed right away while the cheese is still cold and everything feels fresh. If you need to make them ahead, keep them covered in the refrigerator and serve within a few hours.
 Save
Save I'll never forget the moment when my nephew, who's usually too cool for 'cute' party foods, grabbed three of these and then came back asking how many were left. His friends started trading snacks to get extra graduation caps. That's when I realized these little creations had transcended being just appetizers—they'd become the conversation starters and the memory makers of the party.
Flavor Combinations That Work
The beauty of this recipe is how adaptable it is to your tastes and what you have on hand. The classic combination of crispy cracker, sharp cheese, and sweet or slightly salty tassel creates a perfect balance that somehow works on every level. But here's where you can get creative: if you're using fruit leather for your tassels, the natural sweetness pairs beautifully with Swiss cheese. If you go the licorice route, cheddar stands up wonderfully to its bold flavor. I've even experimented with cream cheese mixed with herbs as the adhesive, which adds an unexpected savory note. The key is trusting that as long as your base is solid and your tassel is attached securely, you're going to end up with something delicious.
Storage and Make-Ahead Tips
If you're planning a larger celebration and want to get a head start, you can absolutely prepare these several hours in advance. The trick is keeping everything cold and preventing the cheese from sweating. I arrange them on a serving platter, cover them loosely with plastic wrap, and refrigerate until about 20 minutes before serving. The gradual warming actually helps the flavors meld together a bit. I've found that if you need to make them more than a few hours ahead, it's worth reassembling them fresh rather than storing them, just to ensure everything looks as crisp and intentional as it should.
Making These Special for Different Celebrations
While these are born from graduation tradition, they've become my go-to festive snack for all kinds of celebrations. I've made them with red and white licorice for Fourth of July parties, added tiny fondant decorations for bridal showers, and even created them with colorful fruit leather for children's birthday parties. Each time I make them, I remind myself that the most special recipes are the ones that can adapt and grow with us, taking on new meaning for different moments in life.
- For themed parties, coordinate your licorice or fruit strip colors with your event's color scheme
- You can make these vegetarian, vegan (using dairy-free cheese alternatives), or gluten-free by swapping the crackers and cheese accordingly
- The simplicity of this recipe means you can scale it up or down depending on your crowd size
 Save
Save These little graduation cap snacks remind me that the most memorable food moments aren't always the most complicated ones. Sometimes they're the simplest creations made with the most love and attention to detail.
Recipe FAQs
- → What kinds of crackers work best for the base?
Square crackers such as Wheat Thins or water crackers provide a sturdy, crisp foundation that holds the cheese and tassel well.
- → Can I substitute cheese varieties?
Yes, cheddar, Swiss, or American cheese slices roughly 1.5 inches square work nicely and offer a balance of flavor and texture.
- → What options are there for creating the tassel?
Use black licorice strings or dried fruit strips like mango or apricot cut thin. Both add color and playful texture.
- → How do I keep the tassel attached securely?
Small dots of cream cheese or hummus act as adhesive, gently holding the tassel to the cheese without overpowering flavors.
- → Can this be made ahead of time?
Best served fresh to maintain cracker crispness, but you can prepare components in advance and assemble shortly before serving.