Save
Save My friend showed up with a Cookie Run Kingdom sticker collection one afternoon, and I became oddly obsessed with Pure Vanilla Cookie's elegant design. The pale blue and gold aesthetic stuck with me, so I decided to recreate that magic in cookie form. These vanilla sugar cookies with royal icing became my love letter to that character—delicate, sweet, and just formal enough to feel special. The first batch came out of the oven while golden afternoon light streamed through my kitchen window, and I knew I'd found something worth making again and again.
I brought a box of these to a game night themed around indie games and niche fandoms, not knowing if anyone would appreciate the Cookie Run Kingdom reference. Two people immediately recognized Pure Vanilla Cookie and we ended up talking about the game for twenty minutes while everyone else devoured the cookies without asking what they were. It felt like the cookies had opened a secret door to finding my people.
Ingredients
- All-purpose flour: This is your foundation—it needs to be measured by weight if possible because scooping can pack it down and make your cookies dense. If you only have a measuring cup, spoon the flour into the cup and level it off gently.
- Unsalted butter: Softening it to room temperature matters more than you'd think; cold butter won't cream properly with the sugar, leaving you with a greasy dough that spreads too much while baking.
- Granulated sugar: This sweetens and also helps the cookies spread just slightly for that tender texture, so don't substitute with brown sugar unless you want a chewier result.
- Pure vanilla extract: The real stuff makes a noticeable difference; vanilla-adjacent products taste oddly synthetic when you're expecting that warm, familiar flavor.
- Meringue powder: This stabilizes your royal icing and prevents it from getting weepy or separating, which was a discovery I made after my first batch looked glossy for approximately four minutes.
- Gel food coloring: Liquid coloring will thin your icing and ruin the consistency, but gel stays put and lets you achieve those jewel-tone blues and golds that make Pure Vanilla Cookie look so regal.
Tired of Takeout? 🥡
Get 10 meals you can make faster than delivery arrives. Seriously.
One email. No spam. Unsubscribe anytime.
Instructions
- Mix your dry ingredients first:
- Whisk together the flour, baking powder, and salt in a separate bowl so the leavening distributes evenly. This small step prevents pockets of baking powder that taste weirdly bitter.
- Cream butter and sugar until light:
- Beat them for a full 2-3 minutes until the mixture looks pale and fluffy; this incorporates air that helps your cookies stay tender. You'll hear the mixer working harder as it gets fluffier, which is a good sign.
- Add wet ingredients gently:
- Mix in the egg, vanilla, and milk until just combined so you don't overdevelop the gluten. The dough should come together loosely at this stage.
- Fold in the dry mixture:
- Add the flour mixture gradually and stop mixing the moment everything is combined; overworking develops gluten and makes cookies tough. The dough should look slightly shaggy at first but will come together as you fold.
- Chill your dough properly:
- Dividing into two disks helps it chill faster than one big block. Wrap each disk tightly in plastic wrap and give it at least an hour in the fridge—this prevents the cookies from spreading wildly in the oven.
- Roll and cut with confidence:
- Use a lightly floured surface and work with dough just cold enough to hold its shape but warm enough not to crack at the edges. If your dough gets soft, pop it back in the fridge for ten minutes.
- Bake until the edges hint at gold:
- Watch for that moment when the edges just begin turning golden but the centers still look slightly underbaked. They'll continue cooking on the baking sheet for the first few minutes after you pull them out.
- Cool strategically:
- Leave cookies on the baking sheet for five minutes so they set up, then transfer to a wire rack to cool completely. Decorating warm cookies will melt the royal icing, so patience here is everything.
- Make your royal icing:
- Mix powdered sugar, meringue powder, vanilla, and water until you reach stiff peaks first, then thin slowly with water one teaspoon at a time until it reaches piping consistency. It should look glossy and hold a peak when you lift the beaters.
- Decorate and let set:
- Pipe designs onto fully cooled cookies and let the icing harden completely before stacking or packaging. This takes 2-3 hours at room temperature, but the payoff is that hard, satisfying shell.
 Save
Save The moment the royal icing hardened on my first batch, I understood why people go wild for these cookies. They became objects you could handle, stack, gift in a box, and they still looked perfect three days later. There's something deeply satisfying about baking something that doesn't crumble the moment someone picks it up.
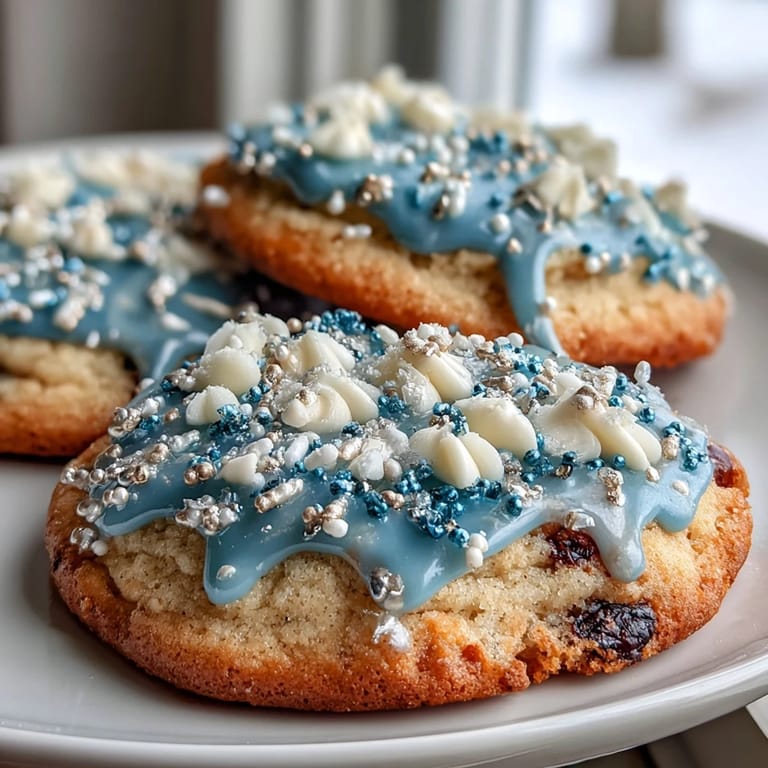
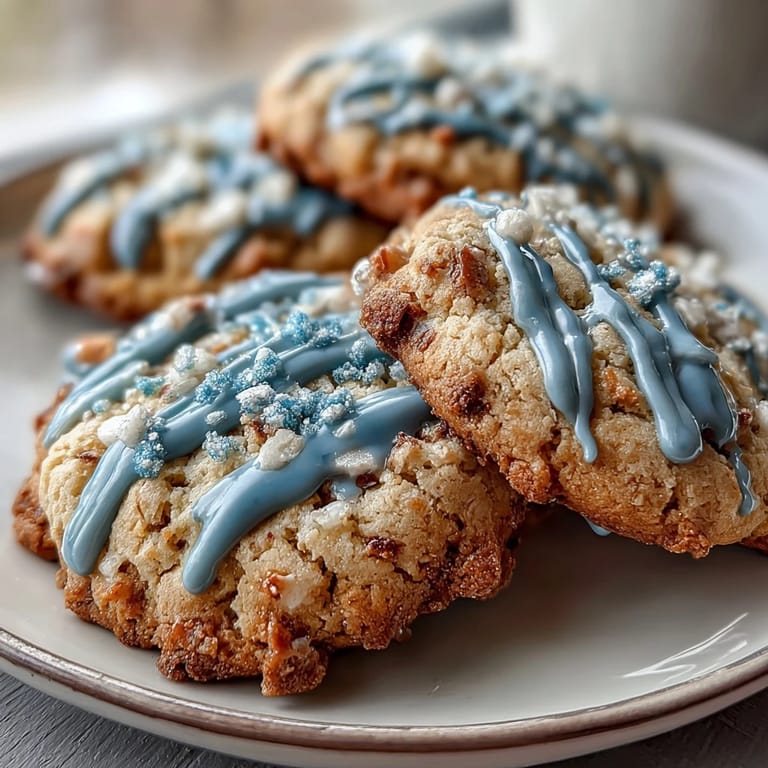
Pure Vanilla Cookie Theme Color Ideas
If you're leaning into the Cookie Run Kingdom aesthetic, the official Pure Vanilla Cookie features soft blue, white, and warm gold tones that feel elegant without being overdone. Try piping a simple blue base, then adding white accents and tiny gold details with a toothpick while the icing is still wet. You can also go minimalist with just white icing and let the cookie shape speak for itself, which honestly looks more sophisticated than you'd expect.
Storage and Gifting
Royal icing cookies are a gift-giver's dream because they stay crisp and beautiful for up to a week in an airtight container at room temperature. I've mailed these to friends in decorated boxes and they arrived pristine, which almost never happens with homemade baked goods. Stack them between parchment paper if you're layering them, and they'll stay perfect even through a car ride.
Customization and Variations
Once you nail the basic recipe, the decorating possibilities are endless and that's where the real fun starts. You can pipe character faces, geometric patterns, or even tiny scenes if you're feeling ambitious with a steady hand and toothpicks for detail work.
- Try almond extract instead of vanilla extract for a subtly different flavor that makes people pause and ask what the secret ingredient is.
- Use cookie cutters in shapes that match whatever theme you're celebrating, from stars to little shields to abstract geometric shapes.
- Practice your piping on a piece of parchment first so you're not learning directly on the cookies you're stressing over.
 Save
Save These cookies became the thing I make when I want to feel like I've created something worth sharing, something that sits on the table looking almost too pretty to eat. Once you've made them once, you'll find yourself baking them again for every occasion that deserves a little extra thought.
Recipe FAQs
- → What gives these cookies their vanilla flavor?
Pure vanilla extract is added to both the sugar cookie dough and royal icing, enhancing the delicate vanilla notes throughout.
- → How is the royal icing prepared?
Royal icing is made by beating powdered sugar, meringue powder, vanilla extract, and warm water until smooth and glossy, then tinted with gel colors.
- → What is the ideal thickness for rolling the dough?
The dough should be rolled to about 1/4 inch (6 mm) thickness for evenly baked, tender cookies.
- → Can the decorated cookies be stored, and how?
Store fully iced cookies in an airtight container at room temperature for up to one week to maintain freshness and decoration.
- → Why chill the dough before baking?
Chilling firms the dough, prevents spreading during baking, and helps achieve clean, crisp shapes.
- → What tools are recommended for decoration?
Use piping bags or squeeze bottles to apply royal icing precisely for detailed and colorful designs.